How to lay out a square to round flat pattern
A square to round joins a square or rectangular duct to a round one. Its surface is four flat triangles and four parts of a cone, one at each corner. The cone parts cannot be measured directly from the drawing, so the pattern is built by triangulation: the surface is divided into triangles, each side is found at its true length, and the triangles are laid out one against the next.
The example
A 600 × 600 mm square to a 300 mm circle, 400 mm high, with the circle on the centre of the square. All sizes are mid-thickness.
Step 1: divide the circle
Divide the circle into 12 equal parts, so that each corner has 3 parts of the circle and 4 lines running to it. The length along the circle for each part is π × 300 ÷ 12 = 78.5 mm. A chord of 77.6 mm is what the dividers step off; finer divisions make the difference smaller.
Step 2: find the true lengths
Each line from a corner to the circle slopes, so its length on the plan is too short. Take the plan length, then the true length = √(plan length² + height²). The four lines of one corner are symmetrical, so there are only two lengths to find.
| Line from the corner | Plan length (mm) | True length (mm) |
|---|---|---|
| 1, 4 | 335.4 | 522.0 |
| 2, 3 | 282.1 | 489.4 |
The seam runs from the middle of one flat side to the circle: its plan length is 150 mm, and its true length is √(150² + 400²) = 427.2 mm.
Step 3: lay out the pattern
- Draw the seam line at 427.2 mm. One end is on the square side, the other on the circle.
- From the square end, measure half a side, 300 mm, to the corner. From the circle end, swing the true length of line 1, 522.0 mm, from that corner. This is the first flat triangle.
- From the corner, swing line 2, 489.4 mm, and step 77.6 mm along from the last circle point. Their crossing is the next point of the circle. Repeat for lines 3 and 4.
- From the end of line 4, swing 600 mm from the corner and 522.0 mm from the circle point to find the next corner: the flat triangle of the next side.
- Carry on round the part, and finish on the other half of the seam line.
- Join the circle points with a smooth curve, and add any seam and flange allowances.
Thickness
Work from mid-thickness sizes: the inside of the square plus one thickness, and the circle's outside diameter less one thickness. Otherwise the part closes too tight or too loose.
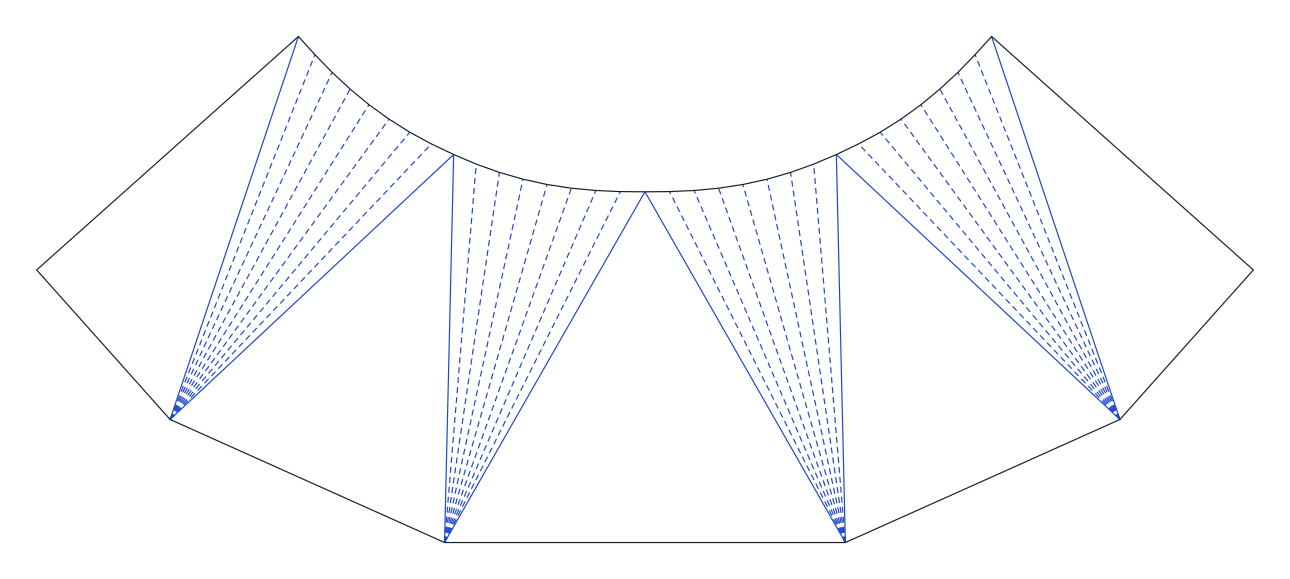
Sample files of this pattern at its default sizes: PDF · DXF
Open the calculatorCheck every pattern against your own standards before cutting.